




Swimming Pool Mosaic Installation Guide: Waterproofing, Adhesive, Grout and Sheet Alignment
Swimming pool mosaic installation is a complete system rather than a simple tile-setting task. The pool shell, substrate preparation, waterproofing, adhesive, mosaic mounting, sheet alignment, grout, movement joints and curing conditions all influence the finished surface.
This practical guide is designed for pool builders, contractors, architects, hotel and resort project teams, installers and buyers who need to understand the main installation decisions before specifying glass or porcelain pool mosaics.
This page is a general project-planning guide. Final waterproofing, adhesive, grout, sealant, movement-joint design and curing requirements must follow the selected product manufacturer, installation-system manufacturer, project specification and applicable local standards.
Quick Answer: How Should Pool Mosaic Tiles Be Installed?
Start with a stable, properly prepared and waterproofed pool substrate. Confirm that the adhesive is compatible with the pool mosaic, mounting system, waterproofing layer and permanent immersion conditions.
Install the sheets while maintaining consistent joints both inside each sheet and between adjacent sheets. After the setting material has cured according to its instructions, grout the mosaic with a compatible pool-use grout, maintain required movement joints, complete final inspection and allow the full installation system to cure before filling the pool.
What Is a Swimming Pool Mosaic Installation System?
A swimming pool mosaic installation system is the complete assembly that connects the structural pool shell to the finished mosaic surface.
Depending on the project, the assembly may include:
- Structural concrete or approved pool substrate
- Surface repair and leveling materials
- Waterproofing membrane or waterproofing system
- Compatible tile adhesive
- Glass or porcelain pool mosaic
- Grout
- Flexible sealants and movement joints
The individual components must work together. An excellent mosaic cannot compensate for an unsuitable substrate, incomplete waterproofing or incompatible setting material.
Installation Parameters to Confirm Before Work Begins
| Item | What to Confirm | Why It Matters |
|---|---|---|
| Pool substrate | Material, curing, strength, cleanliness, flatness and repairs | Creates the base for the entire installation |
| Waterproofing | System compatibility, detailing and curing | Controls water migration through the pool assembly |
| Mosaic material | Glass or porcelain and intended pool application | Different materials may require different setting systems |
| Mounting system | Mesh, dot, paper-faced or other approved system | Influences adhesive contact and installation method |
| Chip & sheet format | Chip size, sheet size, joint layout and orientation | Affects curves, alignment and visual scale |
| Adhesive | Permanent immersion, mosaic material and system compatibility | Controls bond between tile and substrate |
| Grout | Pool-use suitability, joint width, chemistry and color | Affects performance and final appearance |
| Movement joints | Locations, joint type and compatible sealant | Allows required movement within the tiled assembly |
| Curing schedule | Waterproofing, adhesive, grout and final filling times | Premature filling can compromise the installation |
Who Should Use This Installation Guide?
Pool Builders and Contractors
Contractors need to coordinate the pool shell, waterproofing system, tile specification and installation materials before installation begins.
Professional Tile Installers
Installers should review the mosaic mounting system, chip layout, sheet dimensions and product-specific setting instructions before beginning large areas.
Architects and Designers
Designers should understand how chip size, grout color, sheet direction, movement joints, steps and curves influence the finished visual result.
Hotel and Resort Project Teams
Larger projects benefit from mock-ups, approved sample areas and defined installation QC procedures before full-scale work starts.
Importers and Distributors
Distributors should provide customers with the correct product information and confirm which installation requirements apply to each mosaic collection.
Step 1: Prepare the Pool Substrate
A pool mosaic surface should begin with a stable and properly prepared substrate. The exact requirements depend on the structural design and selected installation system.
Typical preparation checks include:
- Concrete or approved substrate has cured as required by the project system
- Loose material, dust, oils and contaminants have been removed
- Cracks, voids and surface defects have been assessed and repaired correctly
- Walls and floors are sufficiently flat for small-format mosaics
- Transitions, coves, drains, penetrations and corners are properly detailed
Small mosaic chips can reveal substrate irregularities more easily than many larger tiles, so surface preparation directly affects the final appearance.
Step 2: Complete the Waterproofing System
Waterproofing should be designed as part of the pool assembly before the mosaic is installed.
Particular attention should be given to:
- Floor-to-wall transitions
- Internal corners
- Drains and outlets
- Pipe penetrations
- Steps and benches
- Expansion and movement-joint locations
The waterproofing material and tile-setting system should be compatible with each other and with permanent pool immersion.
Step 3: How to Choose Adhesive for Pool Mosaic
There is no single adhesive that should automatically be specified for every pool mosaic.
The adhesive should be selected according to:
- Glass or porcelain mosaic material
- Permanent immersion conditions
- Waterproofing membrane
- Substrate
- Mounting system
- Chip transparency or opacity
- Project temperature and environmental conditions
- Installation-system manufacturer's instructions
For translucent or light-colored glass mosaics, the color and coverage of the setting material can influence the appearance. A suitable light-colored adhesive may therefore be specified when recommended by the system and mosaic manufacturers.
The objective is a consistent bond with appropriate coverage behind the mosaic, without excessive adhesive entering the grout joints.
Step 4: Confirm the Mosaic Mounting System
Pool mosaics may be supplied using different mounting methods. The installer should identify the mounting system before selecting adhesive and installation technique.
| Mounting Type | Installation Consideration |
|---|---|
| Mesh mounted | Confirm that mesh and backing adhesive are approved for the selected permanent-immersion installation system. |
| Dot mounted | Check exposed bonding area, sheet flexibility and compatibility with the setting material. |
| Paper / face mounted | Follow the specific installation and face-removal sequence provided for the product. |
Do not assume that all back-mounted mosaics behave the same way underwater. Confirm submerged-use suitability for the exact product.
Step 5: Set the Mosaic Sheets Consistently
Before applying adhesive over a large area, plan the layout and establish reference lines.
During setting:
- Work in manageable areas
- Maintain even adhesive coverage
- Avoid allowing adhesive to skin over before sheets are placed
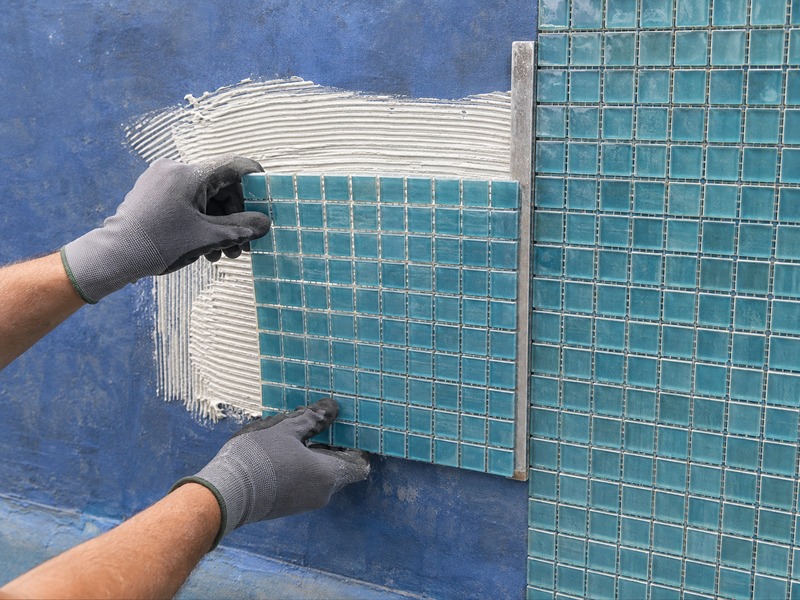
- Press sheets evenly into the setting bed
- Check chip orientation and pattern direction
- Adjust sheets while the adhesive remains workable
- Keep excess adhesive from filling grout joints
Transparent glass may reveal uneven adhesive ridges or voids, so installation technique is particularly important where the backing is visually visible through the tile.
Why Do Mosaic Sheet Lines Appear After Installation?
Visible sheet lines usually occur when the spacing between complete sheets does not match the spacing between individual chips inside the sheets.
Other causes can include:
- Sheets installed too close together
- Sheets installed too far apart
- Uneven substrate
- Misaligned chip rows
- Sheet distortion during handling
- Repeated color clusters in mixed-color products
- Inconsistent pressure while embedding sheets
How to Reduce Visible Sheet Boundaries
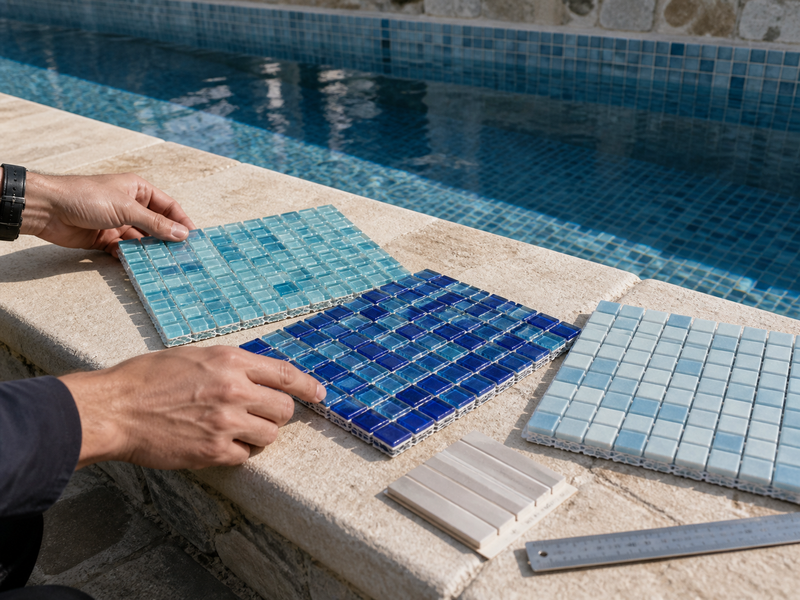
- Dry-check several sheets together before installation.
- Establish accurate layout lines.
- Match the external sheet joint to the internal chip spacing.
- Adjust individual chips where the mounting system permits.
- Review the surface from normal viewing distance rather than only from very close range.
- For mixed-color products, distribute sheets so visually heavy color clusters do not form obvious blocks.
Installing Mosaic on Curves, Steps, Benches and Corners
Small-format mosaics are often selected because they can adapt more easily to curved pool surfaces than larger tiles.
Curves
Check whether the selected chip size and sheet flexibility can follow the radius without excessive opening or compression of joints.
Steps
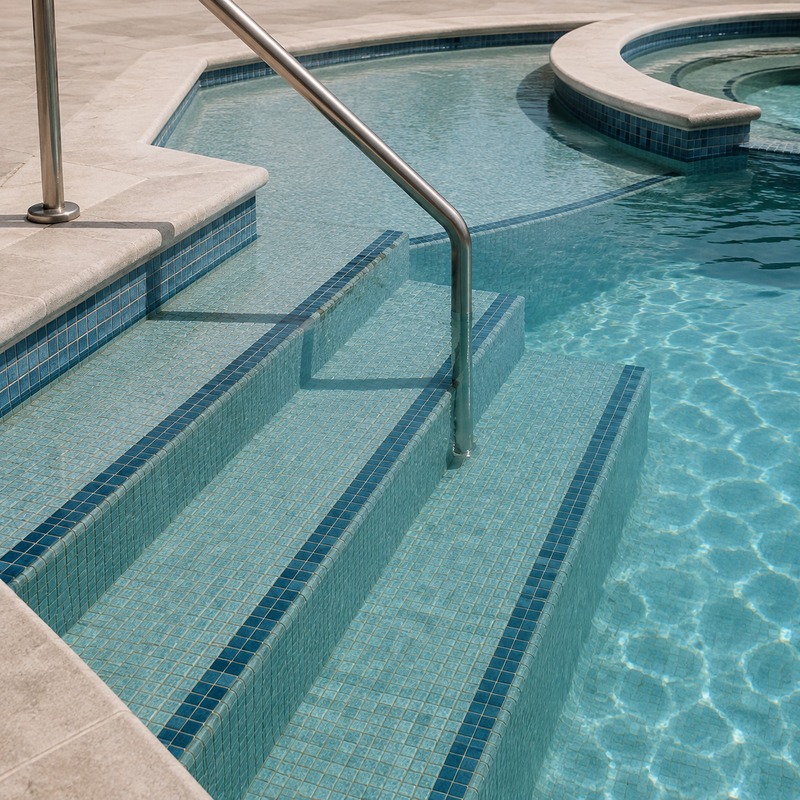
Maintain consistent alignment across risers, treads and edges. The selected surface must also meet the project's safety and slip-resistance requirements.
Spa Benches and Seats
Smaller formats can help follow compound curves, but sheet distortion should be controlled carefully.
Changes of Plane
Corners and changes of plane should follow the movement-joint and sealant design specified for the installation system rather than simply being filled as ordinary rigid grout joints.
Step 6: Select and Apply Pool Grout Correctly
Grout is both a technical and visual part of the finished pool mosaic.
Confirm:
- Permanent-immersion suitability
- Compatibility with the mosaic material
- Compatibility with the joint width
- Resistance required by the pool chemistry and maintenance program
- Cleaning method
- Final grout color
Epoxy and high-performance cementitious grouts are both used in pool projects depending on the specified system. The correct choice should come from the project and installation-system requirements rather than a universal rule.
Because many mosaic sheets have joints around approximately 2mm, grout color can strongly influence the finished surface. Always evaluate a sample when appearance is important.
Step 7: Do Not Grout Over Required Movement Joints
Structural, perimeter and movement joints must remain functional according to the project design.
Flexible sealants and movement-joint profiles should be selected for the pool environment and installed in the locations defined by the architect, engineer or installation-system specification.
Step 8: Respect Curing Times Before Filling the Pool
Waterproofing membranes, adhesives, grouts and sealants each have their own curing requirements.
Do not fill the pool simply because the grout looks dry on the surface. The pool should only be filled after the complete installation system has reached the curing condition specified by the relevant manufacturers.
Pre-Filling Pool Mosaic Inspection Checklist
| Check | What to Review |
|---|---|
| Sheet alignment | No obvious sheet-grid pattern or abnormal joint gaps |
| Loose chips | No visibly loose or unbonded pieces |
| Grout | Joints properly filled and cleaned |
| Movement joints | Required flexible joints remain functional |
| Corners and penetrations | Detailing completed according to system design |
| Surface cleaning | No harmful grout or adhesive residue remains |
| Curing | Required cure periods completed before filling |
Common Pool Mosaic Installation Mistakes
- Installing over an uneven substrate.
- Using an adhesive without confirming permanent-immersion compatibility.
- Ignoring the mosaic mounting system.
- Creating different joint widths between sheets.
- Allowing adhesive to fill grout joints.
- Installing translucent glass over visibly uneven adhesive.
- Rigidly grouting required movement joints.
- Filling the pool before the full system has cured.
- Skipping a sample installation on large or high-value projects.
Illustrative Case: Installing Glass Mosaic in a Hotel Pool and Spa
This example illustrates a project workflow rather than a named customer project.
Project
A hotel project includes a large rectangular swimming pool, entrance steps and a curved spa finished with blue glass mosaic.
Installation Strategy
- Confirm the selected mosaic and mounting system are intended for submerged use.
- Review the pool shell for flatness, defects and required repairs.
- Complete the specified waterproofing system and detailing.
- Create a small installed mock-up to review adhesive coverage, grout color and sheet alignment.
- Establish layout lines before installing large wall and floor areas.
- Use smaller-format sheets carefully around spa curves and steps.
- Check joints between sheets continuously during installation.
- Complete grouting and flexible movement joints according to the project system.
- Inspect the finished surface and respect the full curing schedule before filling.
Key lesson: high-quality pool mosaic installation depends on the complete assembly and installation control, not only on the visual quality of the tile.
Choose the Right Ralart Pool Mosaic for Your Installation
Ralart Mosaic supplies glass and porcelain options for residential, hotel, resort, spa and commercial swimming pool projects.
Frequently Asked Questions About Pool Mosaic Installation
1. Does a swimming pool need waterproofing before mosaic installation?
Pool waterproofing should follow the structural and installation-system design. Mosaic and grout should not be treated as the only waterproofing layer.
2. What adhesive should be used for glass pool mosaic?
Use a setting material specifically confirmed for the glass mosaic, mounting method, waterproofing system, substrate and permanent immersion conditions. Follow the written instructions of the mosaic and installation-system manufacturers.
3. Is white adhesive required for glass mosaic?
A light-colored adhesive is often considered for transparent or translucent glass because the setting bed can influence appearance, but the final material must still meet the project's technical requirements.
4. Can mesh-mounted mosaic be installed underwater?
It depends on the exact mesh, backing adhesive and installation system. Confirm in writing that the product mounting is suitable for submerged installation rather than assuming every mesh-mounted sheet is appropriate.
5. Why can I see square sheet lines after installation?
Visible sheet lines commonly occur when joints between complete sheets differ from the joints within each sheet or when sheets are misaligned, distorted or installed on an uneven substrate.
6. How can mosaic sheet lines be reduced?
Dry-check sheets, establish layout lines, keep external sheet spacing consistent with internal chip spacing and adjust sheets while the adhesive remains workable.
7. What grout is best for swimming pool mosaic?
The grout should be approved for the selected pool environment, mosaic material, joint width and maintenance conditions. Both epoxy and high-performance cementitious systems may be specified depending on the project.
8. Are mosaic joints usually around 2mm?
Many mosaic products use joints around 2mm, but actual spacing depends on chip format and sheet design. Use the product-specific specification.
9. Can ordinary grout be used in a pool?
Do not assume a general-purpose grout is suitable. The grout must be confirmed for the pool environment and the selected installation system.
10. How are mosaics installed on curved spa surfaces?
Smaller chips and flexible sheets can adapt more easily to curves, but joint spacing and sheet distortion must be controlled throughout the curved surface.
11. Should movement joints be filled with normal grout?
No. Required structural and movement joints should remain functional and use the joint treatment specified by the project design.
12. How long should a tiled pool cure before filling?
There is no universal curing period. Follow the waterproofing, adhesive, grout and sealant manufacturers' required cure times for the exact installation system.
13. Should installers make a mock-up first?
A sample installation is strongly recommended for large, transparent, customized or high-value mosaic projects because it allows the team to review appearance, alignment and grout before full installation.
14. Can the same installation method be used for glass and porcelain pool mosaic?
Not automatically. Material, mounting, surface, adhesive and project conditions should be reviewed for the exact product.
15. What information should I send when requesting pool mosaic installation guidance?
Provide the product code, material, mounting method, pool zone, substrate, project location and installation-system information available from the contractor.
Planning a Swimming Pool Mosaic Project?
Send Ralart Mosaic your pool drawing, application area, preferred material, chip size, quantity and project requirements. We can help you select suitable glass or porcelain pool mosaic options and provide product-specific information for your project team.
Request Pool Mosaic Project Support